Earn smart with ATAS for 4PropTrader
Get a free ATAS license and start your challenge
Registration
Get a free ATAS license and start your challenge

1. Register your ATAS account by filing the form above
2. Download and install ATAS for Windows
3. Launch the software using the login and password received by email after registration
4. Connect 4PropTrader account. No account opened? You can register it here
5. Evaluate your trading and get a funded account
More detailed instructions for ATAS installation you can find in our Knowledge Base.
First, you should start ATAS to connect your 4PropTrader account.
On the Authorization window, enter your login and password received by email after registration in the form above.
⚠️ The login credentials from the atas.net website will not be valid.

If you already have a license, you should use a Rithmic connection and choose Rithmic paper trading server or dxFeed prop.
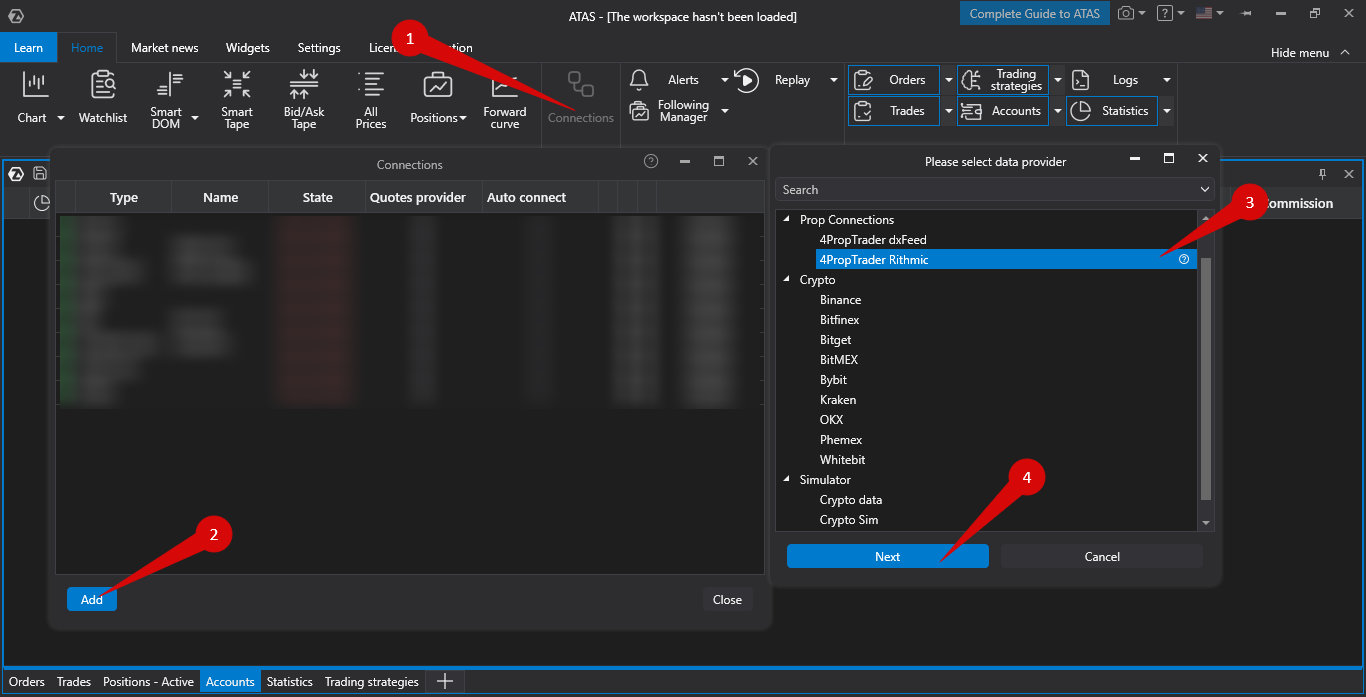
To connect your account, click on the “Connections” (1) button in the main menu, then click the “Add” (2) button.
On the next window, select Rithmic (3) as the data provider for your 4PropTrader account, and click “Next” (4).
If you do not have a 4PropTrader account yet – you can open it by filling the form above.
Enter your login and password provided by 4PropTrader and click “Finish”.

If you want to connect your account automatically every time you start the platform, check the box under the “Auto connect” column and click the “Connect” button.
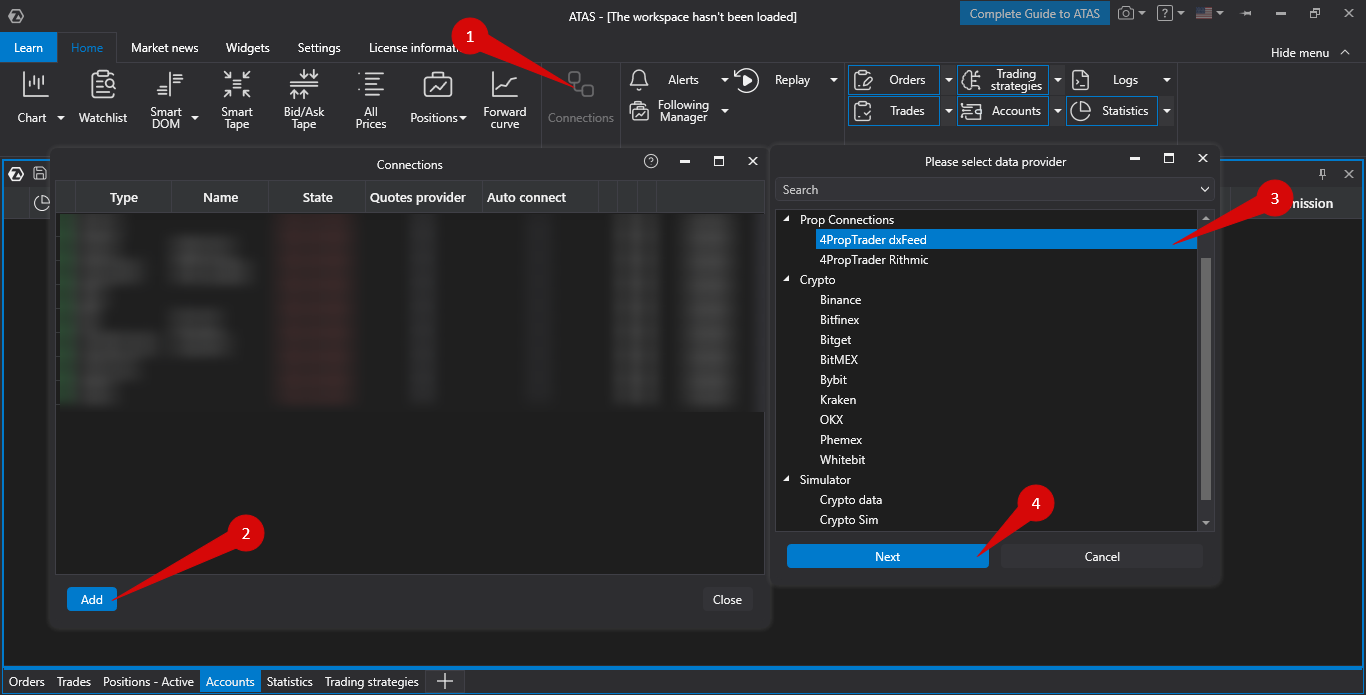
To connect the account with dxFeed, click the Connections (1) button in the main window, then click Add (2), and in the next window, select the 4PropTrader dxFeed (3) and click Next (4).
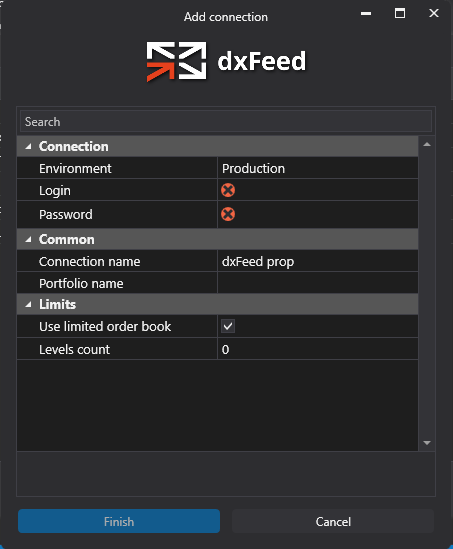
Enter the login and password for dxFeed 4PropTrader account.
After configuring the connection, it will appear as a separate line in the list of connections:
You can read about the settings of this window by following the link: Connection Settings Window.
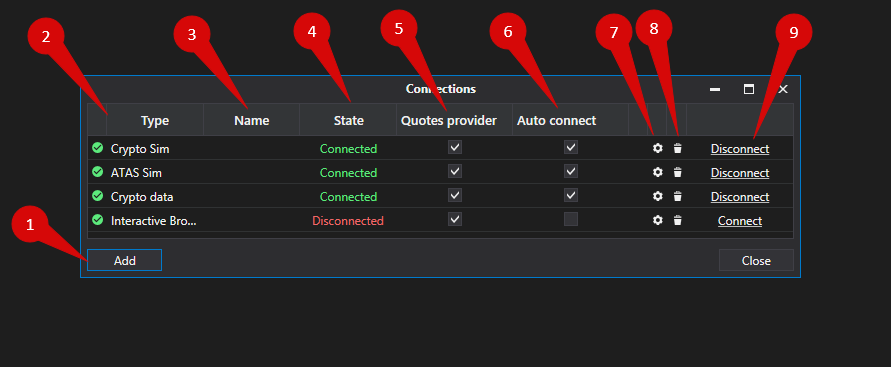
Add – add a new connection
Type – connection source
Name – the name of the connection, which you can set yourself
State – connection status
Is market data – option to choose a quote provider (this connection will be used as the quote provider)
Auto connect – if you want the connection to be established automatically when the platform starts, enable this option
Connection settings button
Delete – to remove the connection from the list button
Connect/Disconnect – connect/disconnect the connector
All set. Your 4PropTrader account is now connected, and you can start evaluation!
No restrictions, ATAS license can be used for all 4PropTrader Evaluations and Funded stages.
Yes, this license type can be used for a 4PropTrader funded account.
DISCLAIMER: Trading on the financial markets is often accompanied by a high level of risk. The product of our company is the software that gives an opportunity to get an additional data for market analysis. The client, in turn, uses the data at his/her own discretion. Any information provided on this site is for informative purposes only and not to be construed as a recommendation for trading operations.
ATAS LLC., 1 Katlakalna street, Riga, Latvia. Registration No.: 40203154738