
Achieve more with ATAS for Vision Trade Futures
Get a free ATAS license and start your challenge
Registration
Get a free ATAS license and start your challenge

1. Register your ATAS account by filing the form above
2. Download and install ATAS for Windows
3. Launch the software using the login and password received by email after registration
4. Connect VisionTrade account. No account opened? You can register it here
5. Evaluate your trading and get a funded account
More detailed instructions for ATAS installation you can find in our Knowledge Base.
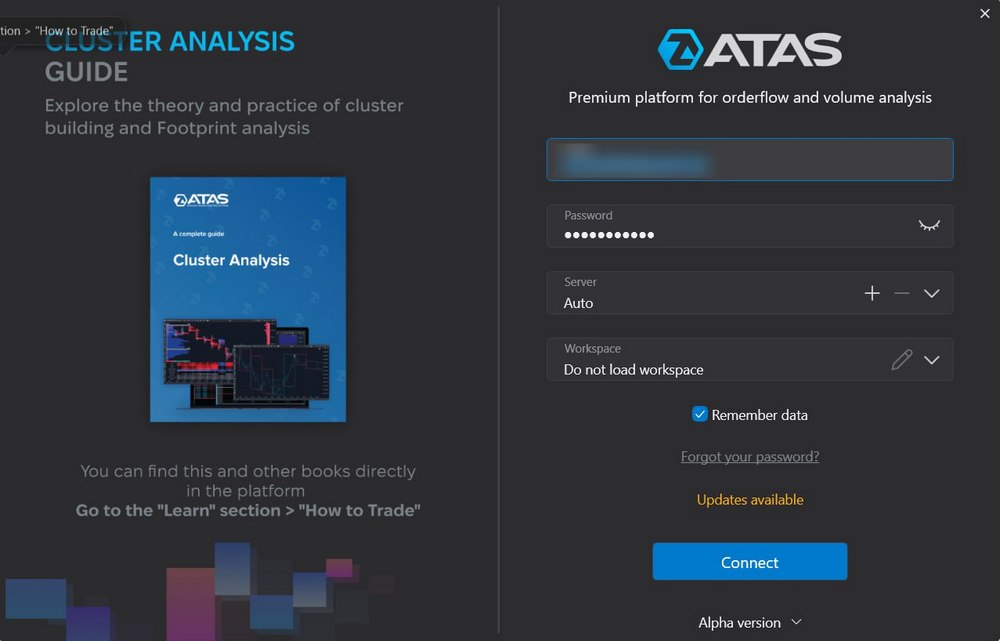
First, you should start ATAS to connect your Vision Trade Futures account.
On the Authorization window, enter your login and password received by email after registration in the form above.
⚠️ The login credentials from the atas.net website will not be valid.
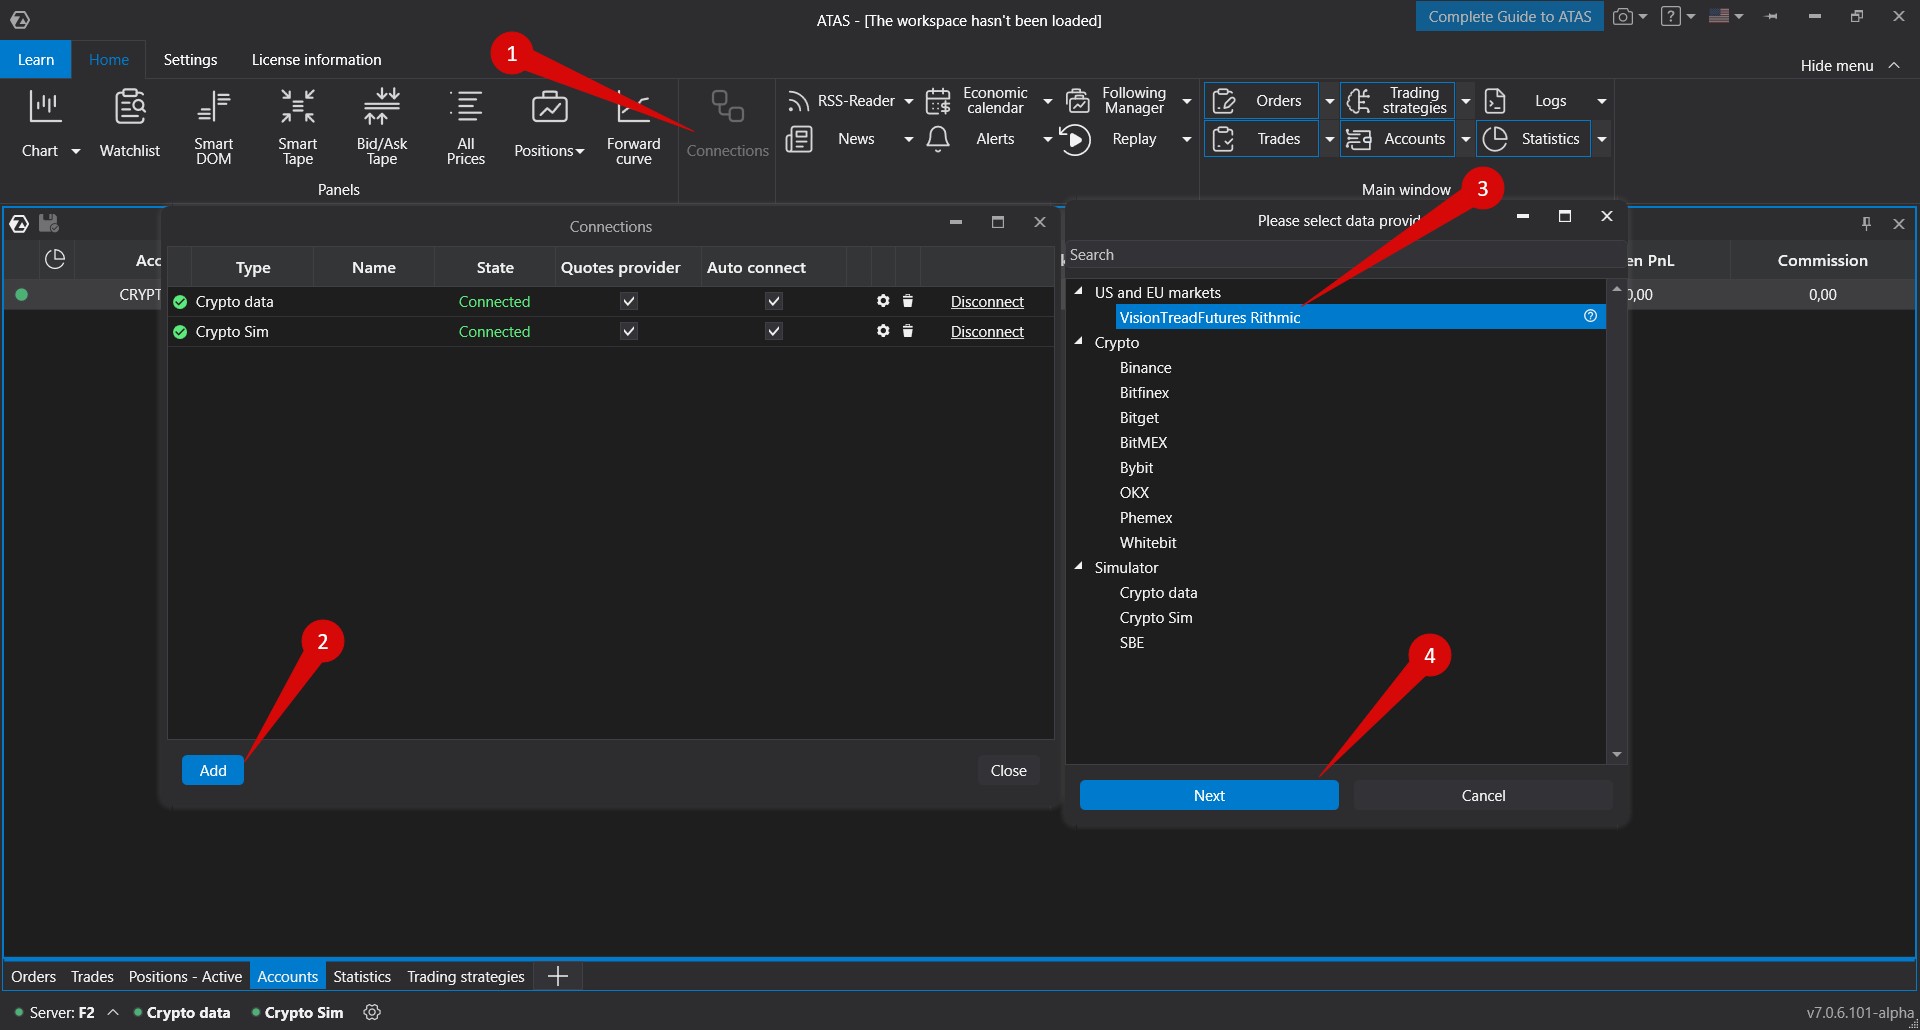
To connect your account, click on the “Connections” button in the platform’s main menu, then click the “Add” button.
On the next window, select Rithmic as the data provider for your Vision Trade Futures account, and click “Next.”
If you do not have a Vision Trade Futures account yet – you can open it by filling the form above.
Enter your login and password provided by Vision Trade Futures and click “Finish”.
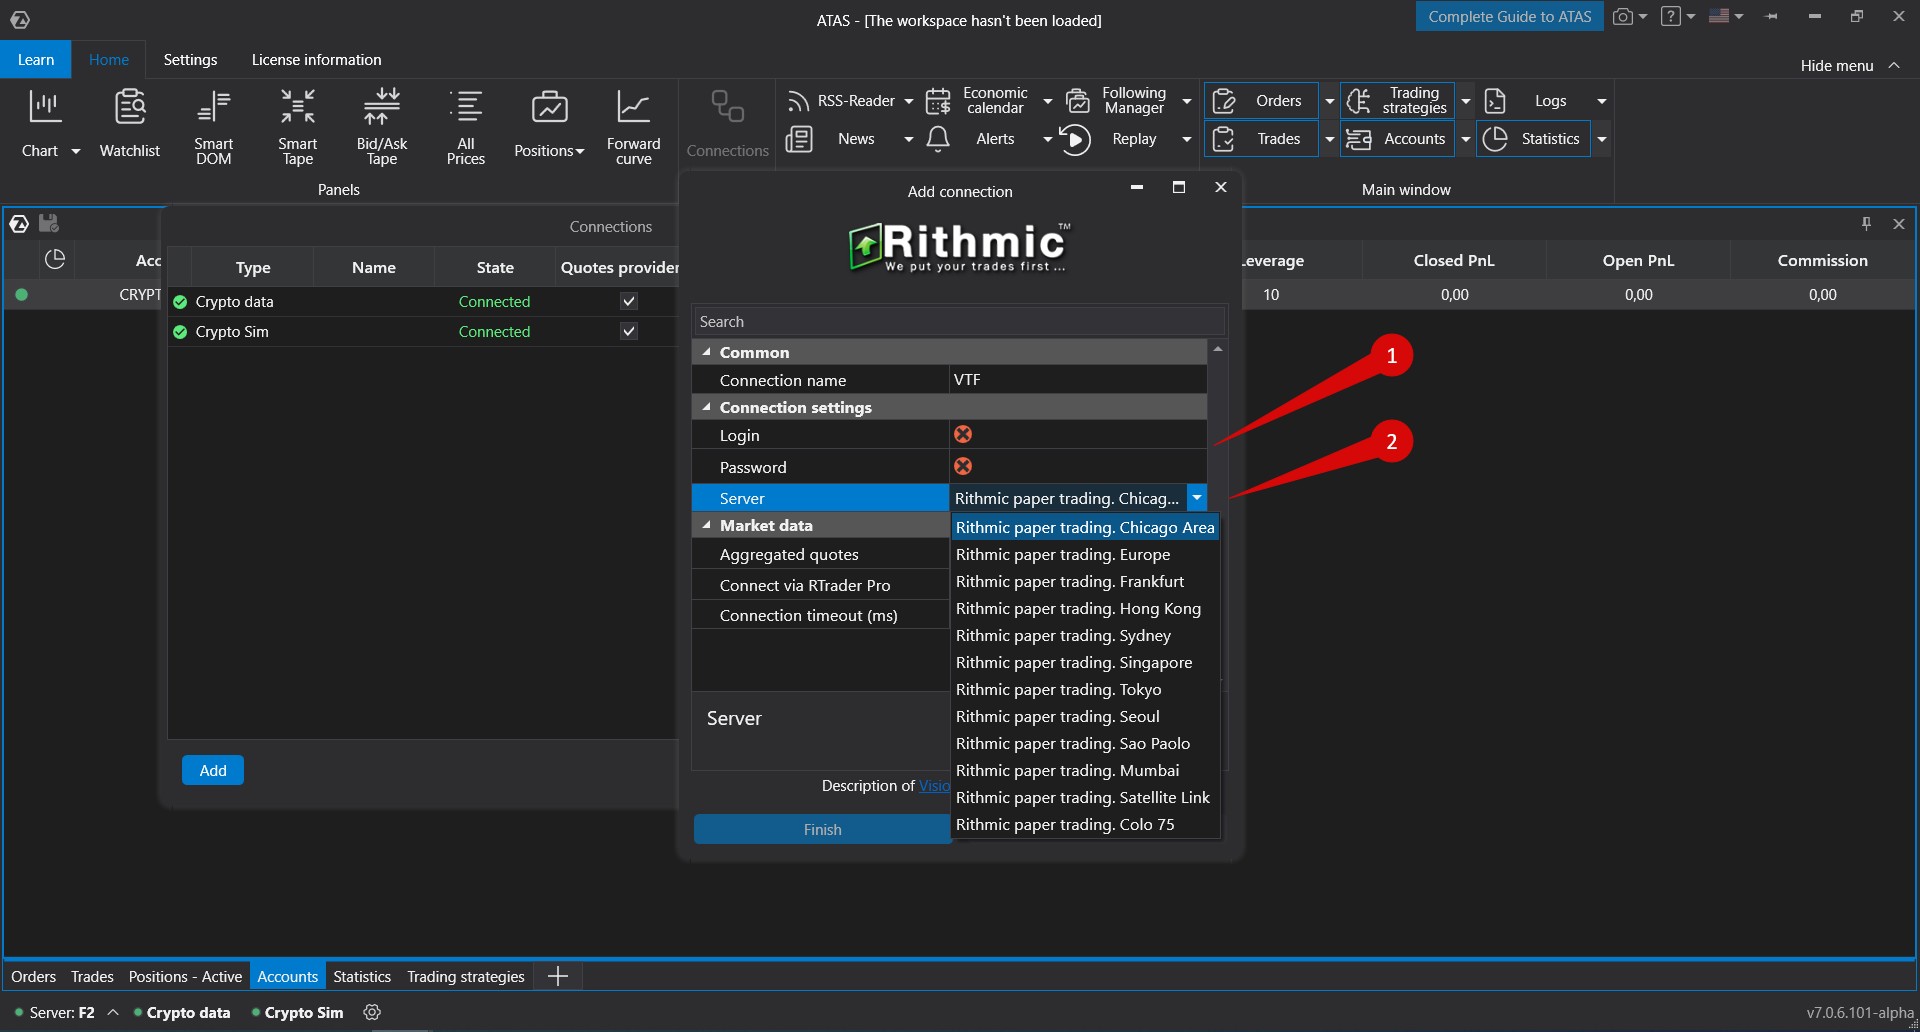
If you want to connect your account automatically every time you start ATAS, check the box under the “Auto connect” column and click the “Connect” button.
All set. Your Vision Trade Futures account is now connected, and you can start evaluation!
When using ATAS license for Vision Trade Futures, only VisionTrade accounts can be connected to the analytical platform.
Yes, you can trade Challenges and SWIFT-PASS Accounts with this license.