Hotkeys
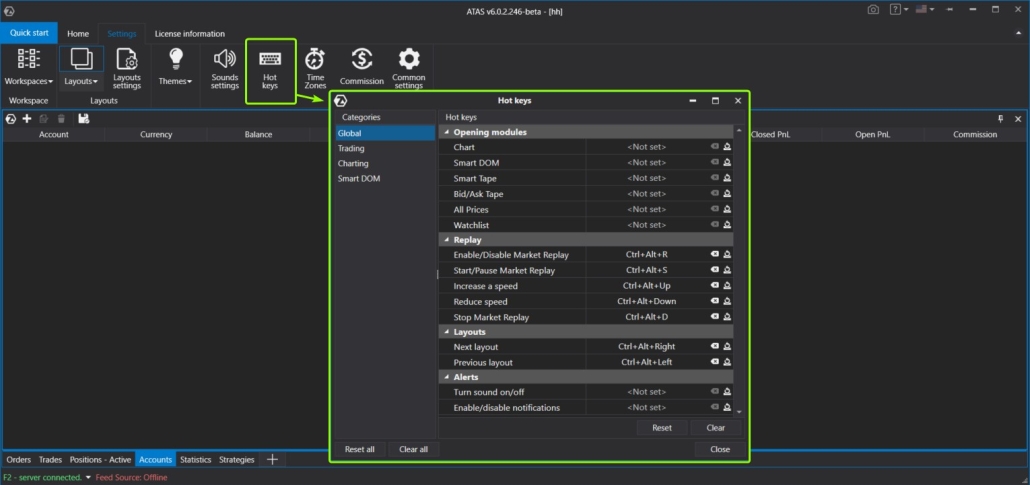
The obvious solution that makes the work with any program much easier. The ATAS platform fully implements the mechanics of hotkeys. Open the main window → go to the Settings tab → click Hot Keys. In the window that opens, you can assign hotkeys to four categories of actions:- Global;
- Trading;
- Charting;
- Smart DOM.
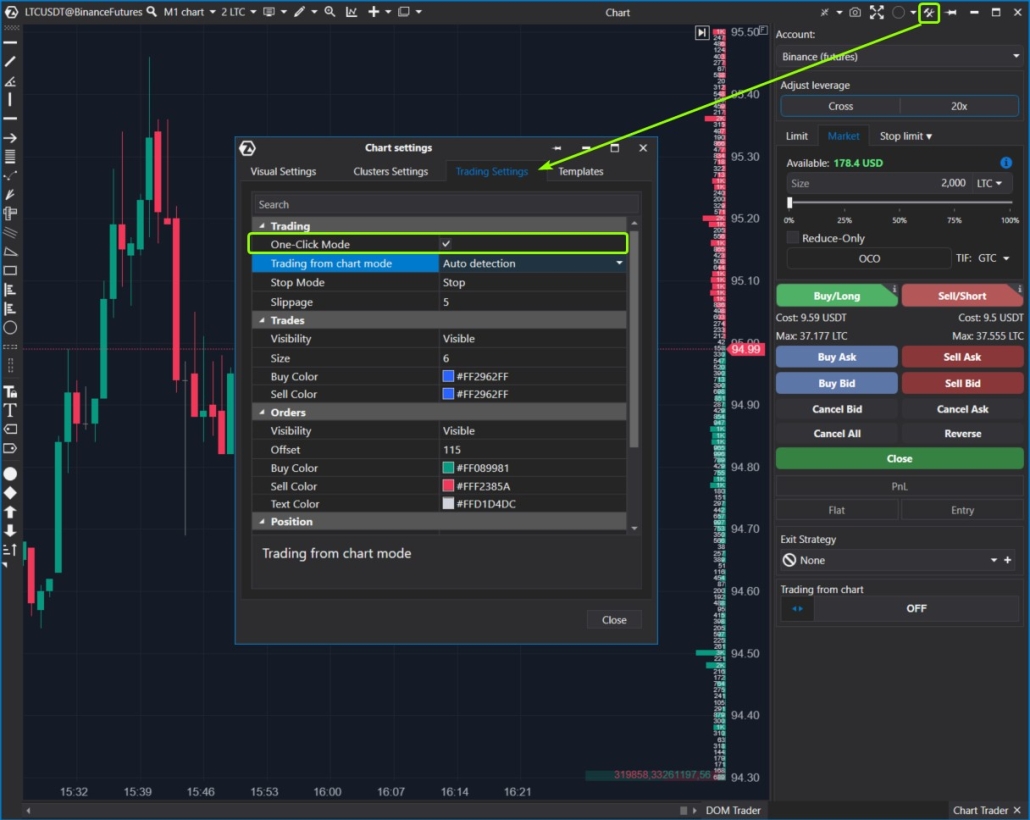
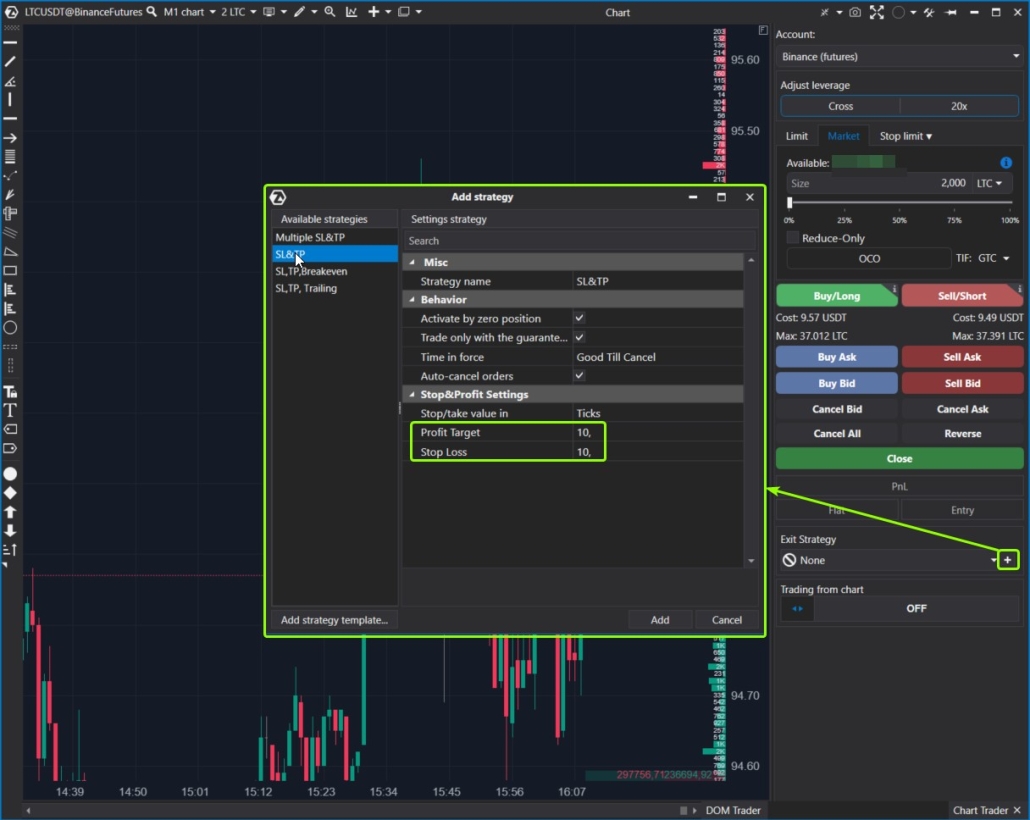
Exit strategies
The exit strategies functionality on the Chart Trader panel allows you to better manage your capital and save time by automatically setting stop losses and take profits.
Templates
A template is a preconfigured set of settings for a chart. To save time and avoid reconfiguring the opening chart to your preferences each time, set it up once, save it as a template, and assign it as the default template.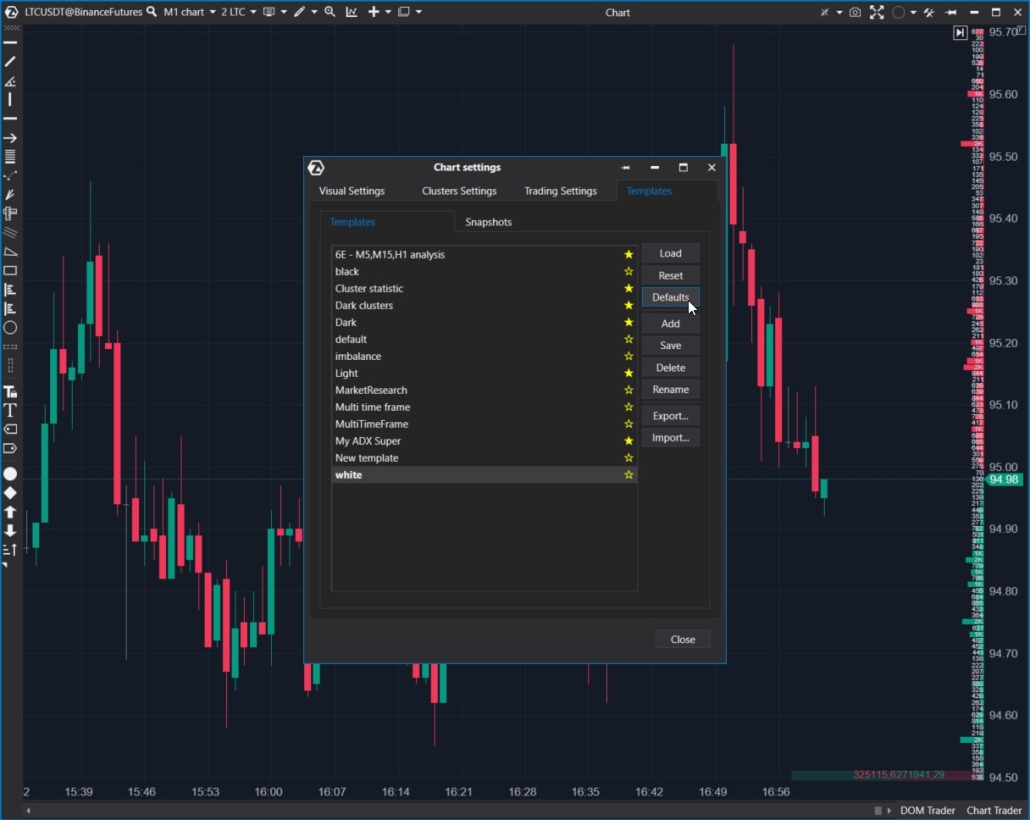
Workspaces and Layers
Workspaces and Layers – functionality that can confuse beginners. But as you become more proficient with the ATAS platform, it will save you a lot of time. This is especially useful if you are monitoring multiple markets across various exchanges, implementing different trading strategies (ranging from scalping to long-term holding), and employing diverse analysis methods using various indicators. For example, you can create five workspaces: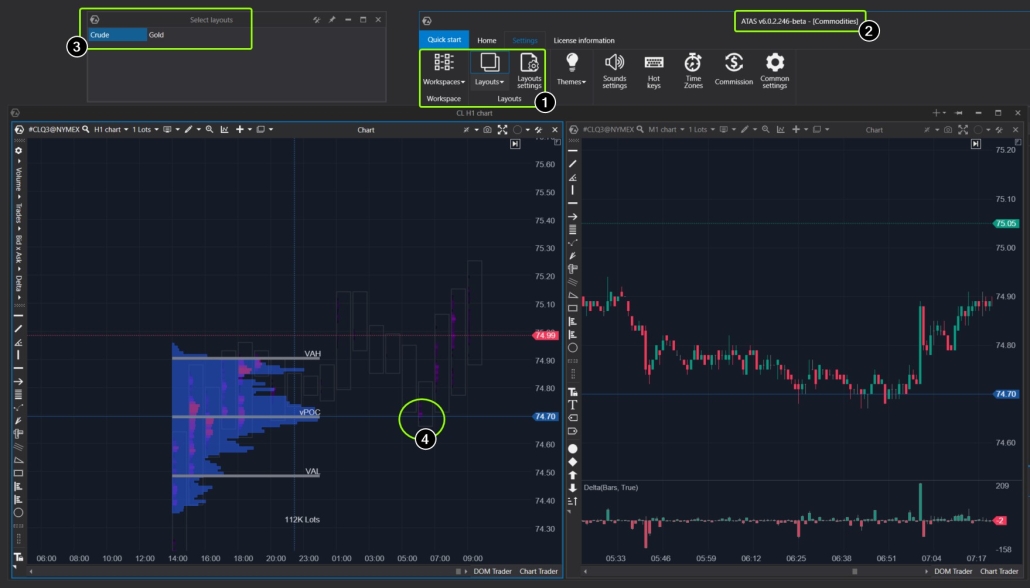
- Buttons for managing Workspaces and Layers. The are located in the Settings tab of the main window.
- The label ‘Commodities’ in the main window header indicates which space is currently open.
- The layer control panel shows that the crude (oil) layer is active. The layer consists of two charts: on the left is a higher time frame for tracking the big picture, on the right is a lower time frame for a more detailed analysis. You can switch between layers in one click.
- Testing of the POC level can be seen on the left chart. The right chart, with the Delta indicator added, can be used to confirm a setup and find a more accurate entry point.
For a better understanding of Workspaces and Layers, we recommend that you refer to the relevant article in the Knowledge Base.
Other ways to speed up
Ways to save time when working with the ATAS platform are not limited to those described above. The platform has many settings that can be used in various ways to save time. Each trader has an individual style, a unique set of knowledge and experience. What may be a time-saver for one person could be considered a loss of important information for another. Here is a list of additional ideas that may be relevant to speed up work with the ATAS platform.- Main window → Settings tab → Common settings : here you can choose the rendering type to optimize the graphics performance based on your computer’s capabilities.
- In the same common settings window, you can lower the Max Candles per chart to speed up the loading of the chart.
- In the chart window, in the timeframe selection menu, reduce the number of days to load to increase chart loading speed
- Use Alerts so that you don’t waste time waiting for the moment when the price approaches the level you are interested in.
- Use Watchlist, learn more about it in this article.
- When launching the Market Replay trading simulator, use the time parameter to specify the starting point for playback. The data will load faster, and you won’t have to wait until the playback reaches the moment you are interested in.
Conclusions
Saving time, staying focused, minimizing the risk of human errors, maintaining a comfortable emotional state, and using preferred tools more conveniently are essential factors for achieving consistent positive results in trading. That’s why ATAS strives to provide maximum flexibility of platform customization. We would like to mention the Market Replay simulator of the ATAS platform separately, as it enables you to accelerate your trading education without risking your capital. Download Free Trial ATAS. It is free. You will get full access to the platform’s instruments during your free trial and will be able to appreciate all their benefits in order to make a purchase decision. Moreover, you will be able to continue using the program even after the 14-day trial period is over, but only for cryptocurrency trading. The ATAS platform:- enables you to download tick history from the futures, stocks and crypto markets so that you can get a detailed picture of the market;
- provides many benefits for traders who want to combine bounce trading with user-friendly cluster charts and useful indicators.
Information in this article cannot be perceived as a call for investing or buying/selling of any asset on the exchange. All situations, discussed in the article, are provided with the purpose of getting acquainted with the functionality and advantages of the ATAS platform.